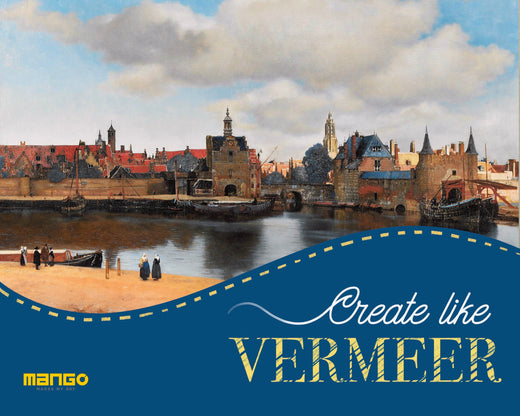
Create Like Vermeer
Johannes Vermeer, the Dutch Baroque painter, is celebrated for his ability to capture light, atmosphere, and everyday life with a level of detail and serenity that continues to inspire artists centuries later. From his precise techniques to his choice of materials, Vermeer’s methods offer a timeless guide for artists looking to create luminous and evocative paintings. This blog dives into his techniques, materials, and approach, helping you understand how to "Create like Vermeer"

Born in Delft, Netherlands, in 1632, Johannes Vermeer produced only about 36 known paintings, making his body of work small yet incredibly impactful. His genre scenes, often depicting domestic interiors, are known for their tranquility, realistic use of light, and meticulous detail. Despite his fame today, Vermeer lived a modest life, struggling financially and gaining recognition only posthumously.

Vermeer’s Style
Vermeer’s paintings stand out for their:
Luminous Quality: His mastery of light and color creates an almost photographic realism.
Attention to Detail: From fabrics to reflections, every element was rendered with care.
Composition: He used simple, balanced arrangements to guide the viewer’s eye.
And his spirit of celebrating ordinary lives and their everyday routines.
The Painting Process
1. Preparing the Canvas
Vermeer began with a well-prepared canvas or wooden panel, which he coated with a ground layer of lead white mixed with oil. This smooth, reflective surface allowed light to interact with the paint layers, enhancing the luminosity of his work.

The Art of Painting, 1668
2. Drawing the Composition
Vermeer often used a camera obscura, a precursor to the modern camera, to study compositions. This device projected an image onto a surface, helping him analyze light, perspective, and proportions.
He made preliminary sketches with chalk or a thin layer of paint, focusing on the overall layout before adding details.

The Art of Painting (Detail), 1668
3. Layering Paint with Glazing
Underpainting: Vermeer laid down a monochromatic base layer (grisaille) to establish values.
Glazing: Using thin, translucent layers of paint, he built up color and light. Each glaze interacted with the layers below, creating a glowing, three-dimensional effect.

The Milkmaid (detail), 1658
Blending: He blended edges meticulously to achieve soft transitions, especially in areas like skin and fabrics.

Girl with a Pearl Earring, 1665
Techniques
Edge Control: Soft and Hard Edges
Vermeer mastered the balance of soft and hard edges to create focus and depth. Soft edges were used in shadowy areas or backgrounds, while hard edges highlighted focal points like pearls or metallic surfaces.

Mistress and Maid (detail), 1667
Selective Impasto
Although Vermeer preferred smooth surfaces, he used impasto selectively to add dimension to highlights:
The sparkle on a pearl earring.
The shimmer on metallic objects like jugs or chandeliers.

A Girl with Pearl Earring (Detail), 1665
Sfumato
Similar to Leonardo da Vinci’s sfumato, Vermeer created seamless transitions between light and shadow, avoiding harsh lines and enhancing the realism of his work.

Girl with Red Hat (Detail), 1665-1669
Materials and Supplies
Paints and Pigments
Vermeer’s choice of pigments was as precise as his technique. He used high-quality, expensive materials, including:

Mediums
He used oil-based mediums, likely mixing pigments with linseed oil or walnut oil for different effects.

A Painter in his studio (detail)
Brushes
Fine brushes for detailed work.
Soft, larger brushes for blending and glazing.
Light in Vermeer’s Work
Light wasn’t just an element in Vermeer’s paintings; it was a subject in itself. He studied how light interacted with surfaces, creating subtle reflections and shadows. Windows, often depicted in his paintings, served as controlled light sources. The careful balance of light and shadow gave his interiors a sense of warmth and realism.

The Astronomer,1668
Vermeer’s Vision
Vermeer’s works often carried deeper meanings beneath their surface beauty:
Domesticity: Scenes of women performing everyday tasks symbolize quiet dignity and the importance of home life.

The Milkmaid, 1658
Spiritual Reflection: Paintings like Woman Holding a Balance suggest moral and spiritual contemplation.

Material Wealth: Objects like pearls, gold, and fine fabrics reflect the growing prosperity of the Dutch Golden Age.
How to Paint Like Vermeer Today
1. Materials You Need:
Oil paints: Invest in high-quality pigments and lead white substitutes


Canvas or smooth panels with a prepared ground layer.

Fine brushes for details and soft brushes for blending.

Oil Paint mediums to create translucent layers or mediums like Liquin to help with the drying process.

2. Practice Edge Control
Experiment with blending techniques to create soft transitions. Use hard edges sparingly to guide attention.
3. Experiment with Light
Study how light falls on objects in your surroundings. Use a single light source to create strong contrasts and subtle gradients.
4. Use Layering Techniques
Start with an underpainting in monochrome. Gradually build up colors with thin glazes, allowing each layer to dry before adding the next.

Are you finding this “Create with _” series helpful? Let us know in the comments. Until next time, Happy Painting!

Leave a comment